December 2011 archive

The Christmas Countdown!

So it’s December and the countdown has begun.

We took out the Christmas tree from the attic last week (yes we use a plastic tree….we like to save the planet!)  and Ethan helped putting it up. Its only a little tree that I bought 10 years ago when I was a student and do not have the heart to replace it with a bigger tree (lots of sentimental values, I am a sucker for that).

Christmas shopping is nearly done, not decided if I want to encourage eating choclates for breakfast by getting Ethan an advent calender countingdown to Christmas (I am sure thats the first thing he wants to do when he is awake in the morning).

Ethan insisted that I take a picture of ‘Hippo’ with our Christmas three.


Making Cotton Cheesecake also known as Japanese Cheesecake (baked)

This is my ‘baby’ brother’s favourite (though he is not really a baby anymore –at 30 years of age this year!). I remember the first time he gave me a piece of cotton cheese cake (Japanese Cheesecake)  from the night market in Malaysia saying that it’s the best cake ever. I must admit, I did fall in love with it even with the conscious thought that it contains loads of cheese i.e. calories! This cheesecake is slightly different than your ‘usual’, it is slightly salty and lemony and not too sweet. It has a smooth, soft and has a velvety texture. I am a sucker for cake and bread that has a soft cotton texture and this cake taste just that, soft like cotton and melts in your mouth…Mmmmmm…..craving for a piece now!
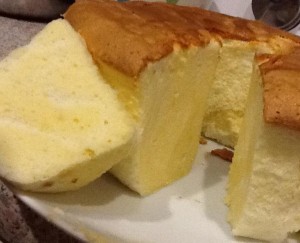
I have made this cake a many times and must admit that it didn’t really turn out right ALL the time. I am rubbish at beating egg whites (its hard work) to make it into a meringue consistency, and this is important. Recently I bought a stand mixer (my new toy) and used that to make this cheesecake…it was a success.


There are 3 problems that I have encountered:

1)      Top half of the cake is lovely and fluffy whereas  the bottom of the cake is dense and heavy

Possible reason: I didn’t mix the batter evenly and the heavy batter sinks to the bottom during baking

Solution: Mix the batter evenly with a mixer with 1/3 of the egg whites prior to folding the remaining 2/3 egg whites…taking care not to over mixing

 2)    Cake sinks during cooling

Possible reason: Cake cooled too fast

Solution: Leave cake to cool in oven for 1 hour with the oven door opened

 3)     Top of cake cracks during baking

Possible reason: oven heat too hot

Solution: Reduce heat

Ingredients 

(adapted from Diana’s Desserts)

  • 250 g cream cheese
  • 50 g butter
  • 100 ml fresh milk
  • 6 egg yolks
  • ¼ tsp lemon essence
  •  60 g self raising flour
  • 20 g corn flour (corn starch)
  • 140 g caster sugar
  • 6 egg whites
  • ¼ tsp cream of tartar

Note: I omitted lemon juice and salt from the original recipe and still find the cake slightly salty

Method

1)    In a large bowl, combine and melt cream cheese, butter and milk over a double boiler (place the bowl over simmering water without letting the bowl touch the water).

2)    Leave the cheese mixture to cool and beat the egg yolk and lemon essence.

3)    Carefully sift and fold in the self raising flour and corn flour into the cheese mixture and set a side.

4)    Beat egg whites in a large clean (oil and water free) metal bowl until frothy and add the cream of tartar into the egg whites. Continue beating and add the sugar in three portions beating in between each addition.

5)    Fold in the egg whites using a spatula into the cream cheese. Add the first 1/3 beaten egg white more rigorously than the 2/3 beaten egg.

6)    Pour the cheese batter into lined baking tray(s) / tin(s).

7)    Place the baking tray(s) / tin(s) into a container filled with water (water submerging half of the tray(s) / tin(s) and bake for 2 hours in a preheated 150 degrees C oven.

You may need to adjust the temperature and time depending on your oven; you know your oven best.

8)    When cooked, turn off the oven and leave the oven door ajar. Leave the cake to cool in the oven for 1 hour.

9)    Store in the refrigerator and ENJOY.

My cotton cheesecake tends to be gone before we need to store it in the fridge!

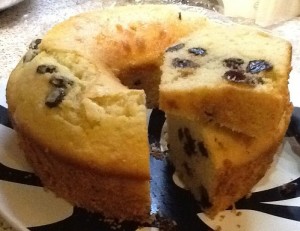
Making Yoghurt, Almond and Raisin Cake

We love yoghurt so much that I make my own every week. I used to make my yogurts from natural yoghurt and milk, then I discovered EasiYo and got lazy. We love EasiYo and have been having  EasiYo yoghurt ever since. In fact, loved it so much that I even experimented using EasiYo in my cake recipes.

This is one of hubby’s and Ethan’s favourite, cake packed with yoghurt goodness (calcium), protein from almonds and iron from raisins. This is a rich cake with a lovely moist texture compared to your usual butter cakes. The almond keeps the cake lovely, fragrant and moist. You can make this into cupcakes and decorate it for kiddie parties.

This cake is very easy to make and fool proof. It will taste delicious even if you overmix the batter.

Ingredients (makes 12 large cupcakes or one 20 cm cake)

  • 140 g self raising flour
  • 90 g caster sugar
  • 100 g ground almonds
  • 1 teaspoon baking powder
  • 150 mL yoghurt (any flavor, I use EasiYo yoghurt, but you can use any brand yoghurt and may need to adjust the amount of sugar depending on the sweetness of your yoghurt)
  • 3 eggs, lightly beaten
  • 1 tablespoon vanilla essence
  • 175 g melted butter
  • 150  g raisins

Method:

1)    In a large bowl, combine all the dry ingredients (flour sugar, almonds, baking powder) and make a well.

2)    Mix the  yoghurt, eggs and vanilla extract in another bowl.

3)    Pour (2) into the well of dry ingredients (1).  Add the  melted butter and quickly fold in the dry ingredients. Try not to overmix (don’t worry too much if you have).

4)    Toss the raisins into a little flour and fold into the mixture.

5)    Pour the batter into a 20 cm cake tin or spoon the batter into 12 cup cake cases.

6)    Bake for 20 to 35 minutes in a preheated oven (190 degrees C  or 170 degrees C for a fan assisted oven) or until risen and springy to the touch. You may need to adjust the temperature depending on your oven, you know your oven best.

7)    When cooked, cool for a few minutes before transferring to be cooled completely on a wire rack.

Making Sweet Custard Buns (containing TangZhong)

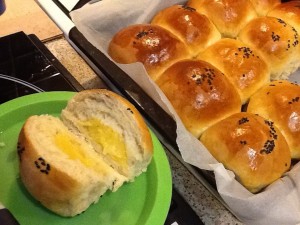
Mmmmm sweet custard buns, my all time favourite! Hubby was craving for them and asked if I could make some. I have never made the custard filling for buns before. Here is how I’ve done it, first attempt and it was scrumptious, definitely deserve a pat on the back.
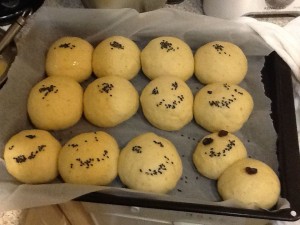
I went for the solid (rather than runny) but soft custard filling. We dislike desiccated coconut so did not include any in the filling.

Spot the snowman!


Ingredients for custard buns (makes 12 large buns or 24 smaller buns)

For custard filling:

2 tablespoons custard powder

1/3  cup sugar

¼ cup corn starch

½ cup coconut milk

2 tablespoons condensed milk

2 tablespoons butter, cut

2 large egg yolks

1 teaspoon vanilla extract

For dough, refer to ingredients to make Pai Bao

Method:

For custard filling: Mix custard powder, sugar and cornstarch in a saucepan. Slowly add coconut milk to make a paste. Add the condensed milk and mix well. Heat the mixture over low heat stirring constantly until smooth. Add butter and mix well.  Keep the mixture stirring until it thickens. Whisk or use an electric mixer to beat the custard when it thickens, remove from heat. Add the vanilla extract to the egg yolk and add the egg yolks into the mixture.  Keep mixing to ensure the egg yolks are well incorporated. Returns to heat to thicken the custard. The custard filling is ready when it turns semi solid. This custard filling can be kept in the refrigerator for a couple of days.

 To make the dough, refer to the methods described for Pai Bao, with the following modifications to shape the buns:

1)      After first proofing, deflate to remove the air in the dough and divide into 12  equal portions to make large buns or 24 smaller buns to make smaller portions.

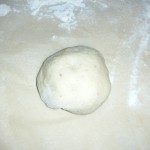
2)    Roll out each portion of the dough with a rolling pin into a circular shape. Shape the custard filling into a ball and place a custard ball in the middle of the rolled dough.  Make the dough into a ball.

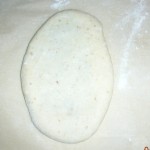
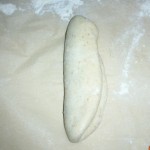
3)     Roll the filled dough into an oval shape. Repeat with the rest of the dough and custard balls.

4)     Place it on a large baking tray to be covered with cling wrap or a damp cloth for 1 hours and 30 minutes.

5)    Lightly brush the surface with whisked egg (egg wash). Decorate the balls with sesame seeds (optional).

6)     Bake in a pre-heated oven at 150 degrees C for 10 to 20 minutes, until the buns  turn brown.

7)    Remove from the oven and transfer onto a wire rack. Let cool completely. I have a fan assisted oven, depending on your oven you may need to alter the temperature and time. As long as the top turns brown your buns should be ready. Only you know you oven best.

You can make heart shaped custard buns or ‘tear and share’buns: Refer to Heart Shaped Cinnamon buns on how to.


Making Sweet Sausage Buns (containing TangZhong)

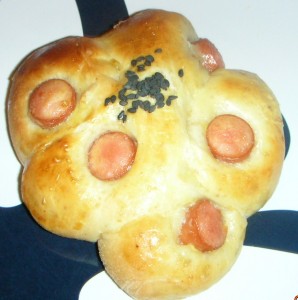
Sausage buns and rolls are Ethan’s favourite. He loves the fact that he can do abit of ‘treasure’ digging, digging the sausages out to eat first and leaving the bread for dessert!  This is another variety of sausage buns.


Ingredients for Sausage Buns (makes 15 large buns) 

For dough, refer to ingredients to make Pai Bao and 15 cooked frankfurter sausages (lightly boiled and drained), sesame seeds for garnishing (optional)


Method:

To make the dough, refer to the methods described for Pai Bao, with the following modifications to shape the buns:

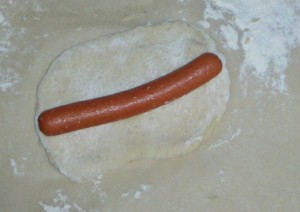
1)    After first proofing, deflate to remove the air in the dough and divide into 15 equal portions. Roll out a portion of the dough with a rolling pin into an oval shape, about the length of the sausage.

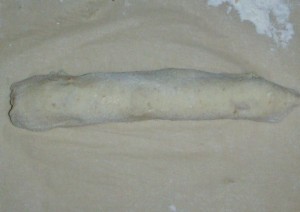
2)    Place the sausage on the dough and roll to cover the sausage.

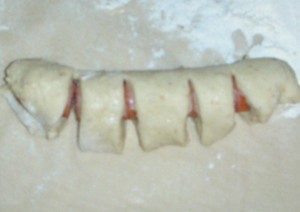
3)    Make 4 equal slits cutting through the sausage but not to the edge of the dough.

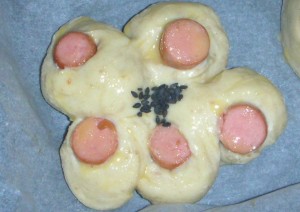
4)    Gently twist the cut sausage without breaking the dough to make into a flower.

5)    Repeat with the rest of the dough and sausages.

6)    Place it on a large baking tray to be covered with cling wrap or a damp cloth for 1 hours and 30 minutes.

7)    Lightly brush the surface with whisked egg (egg wash). You can sprinkle some sesame seeds in the middle of the bun.

8)    Bake in a pre-heated oven at 150 degrees C for 10 to 20 minutes, until the buns  turn brown.

9)    Remove from the oven and transfer onto a wire rack. Let cool completely. I have a fan assisted oven, depending on your oven you may need to alter the temperature and time. As long as the top turns brown your buns should be ready. only you know you oven best.


Save Money and Make Your Own Homemade Play Dough (cooked method)

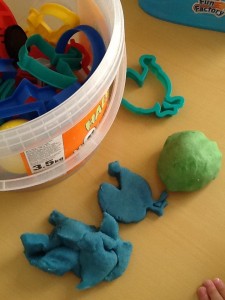
All kids love play dough, mine is no exception. There is no cheaper way than making your own. These lovely homemade dough keeps Ethan occupied for hours while I make dinner or bake. They are made from ‘non-toxic’ food ingredients and preserved with salt. Just keep the dough in air tight containers and they can lasts for months. For budding artists, you can use them as modelling clays. My little artist would make little figurines, leave them to dry and harden, then paint the harden dough afters. They are loads of fun.
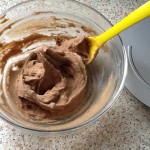
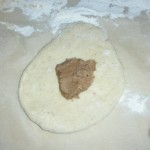
This recipe involves a little cooking. We prefer the cooked to the non cooked play dough as the cooked version has a better texture.  Have your little one make some with you and you can have limitless fun with your homemade play dough. As the play dough may smell like food, just make sure that your pets don’t gobble them up. Although they are not toxic it contains loads of salt, it will make your pets ill from salt imbalance. Having said that, Ethan had a bite of our homemade playdough, spat it out and asked for a glass of water, LOL, the little monkey!

Try making your own paly dough and save some money. Every penny counts and there is definately no lack of fun factor . Enjoy!

Ingredients

  • 2 cups of flour
  • 2 cups of water
  • 1 cup of salt
  • 2 tablespoon of vegetable oil
  • 1 table spoon of cream of tartar (this helps to make the dough more elastic, as cream of tartar changes the acidity of the dough)
  • Food colouring

Method

Mix all the dry ingredients in a pan. add one cup of cold water and make into a paste to ensure there are no lumps, slowly add the rest of the water then oil. Heat the mixture in low heat stirring constantly to prevent burning. The paste will thicken into a dough. Leave to cool and your play dough is ready. Remember to store in an airtight container or the play dough will harden.

You can add food colouring into the water before you cook the dough or like me, you can make the dough first, divide the dough into a few portions whilst it is warm and add a different colour to each portion of dough. If you are adding the food colouring after the dough is cook, you will need to knead the colour into the dough.

With this latter method, you only have to make/cook one batch of dough whereas the former method you will only get one colour for each cooked batch.

Be careful, concentrated food colouring may stain.

p/s for the TangZhong addicts, this homemade play dough shares similar elastic properties as our beloved water roux started for bread.


Making Heart Shaped Cinnamon Buns (containing TangZhong)

Its Christmas, lets share some joy and love by making heart shaped cinnamon buns for everyone including Santa!

Ingredients for Heart Shaped Cinnamon Buns (makes 12 large buns or 24 smaller buns)

For cinnamon filling:

  • 80 g light brown sugar
  • 35 g flour
  • 1 tablespoon ground cinnamon
  • 113 g butter softened (you can use salted or unsalted)

For dough, refer to ingredients to make Pai Bao,

Method:

For cinnamon filling: Combine and mix the sugar, flour and cinnamon in a medium size bowl. Cut in the butter and mix well. Set aside (this can be made in advance and refrigerated, unused protions can be kept in the refrigerator for several days).

To make the dough, refer to the methods described for Pai Bao, with the following modifications to shape the buns:

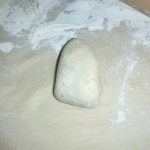
After first proofing, deflate to remove the air in the dough and divide into 12  equal portions to make large buns or 24 smaller buns to make smaller portions.

Roll out each portion of the dough with a rolling pin into a circular shape. Place a dollop of cinnamon filling in the middle of the rolled dough.  Make the dough into a ball.

3)     Roll the filled dough into an oval shape.


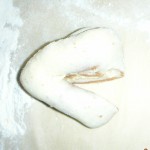
4)    Fold the rolled dough and roll to the edge with a rolling pin.

5)     Fold the dough again and roll the dough to the edge with a rolling pin.

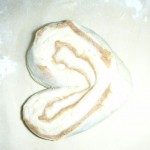
6)    Cut the dough and open out the dough to make a heart shape.

7)     Repeat with the rest of the dough and cinnamon filling.


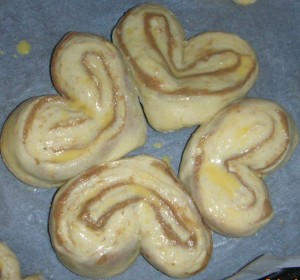
8)    Place it on a large baking tray to be covered with cling wrap or a damp cloth for 1 hours and 30 minutes. You can arrange the heart buns to make a flower or leave them separated to proof.


9)    Lightly brush the surface with whisked egg (egg wash). Bake in a pre-heated oven at 150 degrees C for 10 to 20 minutes, until the buns  turn brown.

10) Remove from the oven and transfer onto a wire rack. Let cool completely. I have a fan assisted oven, depending on your oven you may need to alter the temperature and time. As long as the top turns brown your buns should be ready. Only you know you oven best.

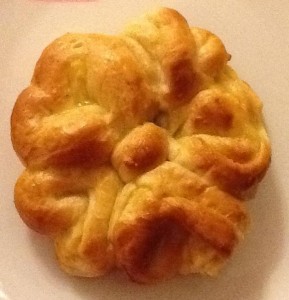
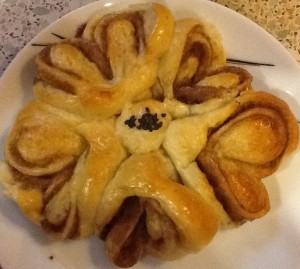
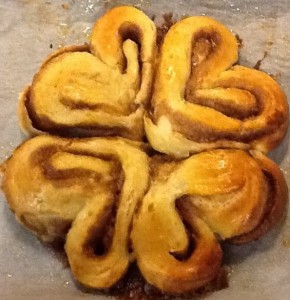
Here is one I made into a flower with a ball of dough in the middle, a ‘tear and share’ bun.


Making Mini Sweet Sausage Rolls (containing TangZhong)

I have been making bread and posting it on my Facebook pages for the last 2 weeks. The pictures stirred up a little storm and a few friends have shown interest. We decided to get together in our weekly play date session and arranged to make bread with the kiddies (bread making class 001, LOL). A few mummies and kiddies could not make it, but for those who could make it, we had fun and went back with yummy sausage rolls.
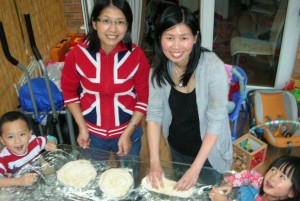
There were three mummies, three newborn babies (sleeping) and two 3-years old toddlers.
Ingredients for Mini Sweet Sausage Rolls (makes 30 mini rolls)

Refer to ingredients to make Pai Bao, 15 frankfurter sausages (halved to make 30 pieces, you can also leave it as it is to make bigger sausage rolls)

Method:

To make the dough, refer to the methods described for Pai Bao, with the following modifications:

After first proofing, deflate to remove the air in the dough and divide into 30 equal portions to make mini rolls (or 15 portions to make bigger rolls).

Roll out each portion of the dough with a rolling pin into an oval shape. Fold 1/3 from top edge to the middle and press down. Then roll the dough to the edge. Pinch the dough to seal. Roll and stretch to wrap around the halved sausage. Repeat with the rest of dough and sausage. Place it on a large baking tray to be covered with cling wrap or a damp cloth for 1 hours and 30 minutes.

Lightly brush the surface with whisked egg (egg wash). Bake in a pre-heated oven at 150 degrees C for 10 to 20 minutes, until the rolls turn brown (I bake it for 15 minutes).

Remove from the oven and transfer onto a wire rack. Let cool completely. I have a fan assisted oven, depending on your oven you may need to alter the temperature and time. As long as the top turns brown your buns should be ready. Only you know you oven best.

I have also made mini pandan sausage rolls by adding 1/4 teaspoon of pandan paste together with the wet ingredients during the dough mixing stage. It was yummy!


Experimental Cookery: Water Roux Starter (TangZhong)

I found this cool site, promoting the book “Experimental cookery from the chemicals and physical standpoint” by Belle Lowe (okay I am a nerd, read on as it may be interesting for bread maker enthusiasts). A section of the book describes factors that may change the properties of gluten and hence its tenacity or cohesiveness, and its elasticity or extensibility. Belle describes that, “the properties of gluten can be altered  by: (1) grinding, (2) bringing the dough to a certain acidity or alkalinity and subsequent neutralization, (3) treating with alcohol, (4) salts, (5) alkalies, (6) acids, (7) proportion of water used, (8) added substances, (9) temperature, (10) time of standing, (11) mechanical treatment of the dough, and (12) fermentation. By understanding and working with the principles described by Belle we can make some seriously good bread.

Coming across the use of TangZhong in bread making is like magic, better than fairy dust  for bread. It makes my bread springy, soft and fluffy (almost like eating cotton candy).

Ingredients for making TangZhong (makes approximately 240 g)

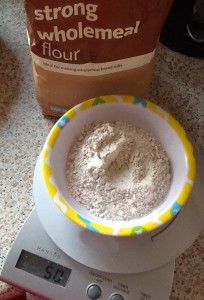
  • 1) 50 g bread flour (Plain or wholemeal or seed and grain bread flour works)
  • 2) 250 mL water or fresh milk

Method for making TangZhong

1) Mix the flour with 100 mL of cold water or milk and make into a paste with a spatula.

2) Add the rest of the cold water or milk ensuring that there are no lumps.

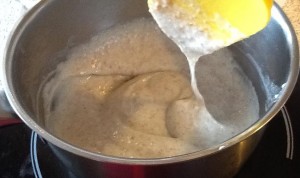
3) Heat the flour mixture on low heat (about 65 degrees C) stirring continuously to prevent sticking and burning. It takes about 3 minutes.

4) Once the flour paste had thickened, your TangZhong is ready. Transfer it into a clean bowl and cover with a cling wrap to cool. You can keep the TangZhong to about 3 days in the refrigerator .

For the chemists out there:

By making an initial paste in Step 1, this step will ensure that the flour is evenly mixed and hydrated. By heating the flour paste to 65 degrees C, the hydration of the gluten in the flour is enhanced making the dough more elastic and less tenacious. This increase in elasticity is important, for without this quality, the cell walls of the dough would break and coalesce before the temperature was reached at which the protein is coagulated (making hard bread).

If you have tried baking bread with TangZhong, I can guarantee you that there is no turning back. You will be so hooked and addicted to bread containing TangZhong!


My sous chef


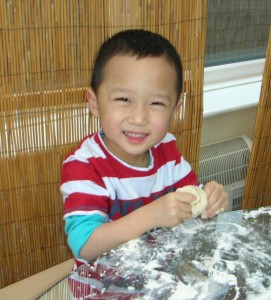
When my 3 year old is at home with me, I love to make him my sous chef. He loves to ‘tickle’ flour and whatever ingredients we prepared which includes oil, milk, sugar, eggs and butter. He loves to get in there and get dirty.

A sucker for punishment you may call me as after we finish cooking, (as you can imagine) there is usually a lot of cleaning involved!

My sous chef at work!