It was my old friend from Uni who got me interested with this dish. We were chatting on Facebook when Richard mentioned that his wife will be making Momofuku pork belly buns for dinner. I was intrigued, didn’t know what Momofuku was but the word ‘pork belly’ caught my attention. So I did my usual Google search and found Veronica from Kitchen Musing’s recipe.
Here is my slightly modified version.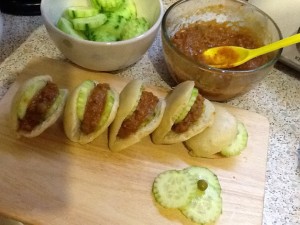
Ingredients (makes 50 buns)
1 ) 1 tablespoon plus 1 teaspoon active dry yeast
2 ) 1 1/2 cups water, slightly warmed
3 ) 6 tablespoons sugar
4 ) 3 tablespoons semi skimmed milk powder
5 ) 1/3 cup butter
6 ) 4 1/4 cups bread flour
7 ) 1/2 teaspoon baking powder
8 ) 1/2 teaspoon baking soda
9 ) 1 tablespoon salt
10) Some cooking oil for shaping the buns
Method
1 ) I used my trusty breadmaker to do the mixing, kneading and first proofing. The ingredients were placed in the breadmaker in accordance to the list above and function set to ‘Dough’ on my breadmaker, sit back and relax. The ‘Dough’ cycle on my bread maker takes 1 hour and 30 minutes.
If you do not have a breadmaker, mix all dried ingredients and make a well. Combine the yeast and water in a bowl. Carefully pour the water containing yeast into the well and mix gently until all ingredients are incorporated. Knead gently for about 10 minutes do not over do it or you may break the gluten in the flour. Oil a medium mixing bowl, put the dough in it, and cover the bowl with a dry kitchen towel. Proof the dough for 1 hour and 30 minutes.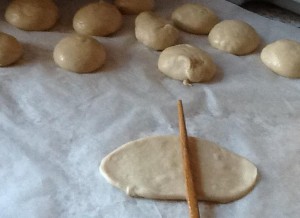
2 ) After first proofing, remove dough from the breadmaker (or oiled bowl, if not using a breadmaker) and punch the dough down.
3 ) Oil the work surface and hands with some cooking oil.
4 ) Divide the dough in 50 portions (each weighing approximately 25 g).
5 ) Roll each piece into a ball, cover them with cling wrap and proof for 30 minutes.
6 ) Prepare fifty 4-inch squares of parchment paper.
7 ) Coat a chopstick or skewer with cooking oil.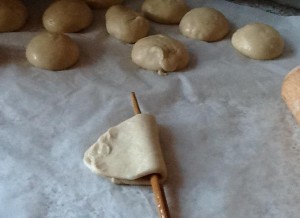
8 ) Roll a ball into a 4-inch-long oval with a rolling pin. Place the greased chopstick or skewer across the middle of the oval and fold the dough into half.
9 ) Carefully Remove the chopstick and place the dough onto a square paper parchment.
10) Repeat to shape all the dough and cover the shaped dough with cling wrap and proof for a further 30 to 45 minutes.
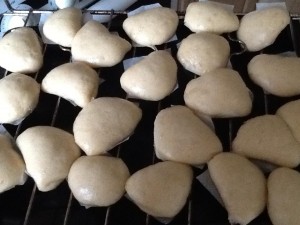
11) Steam the buns for 10 minutes and they will be ready for your indulgence. Cool the buns on a wire rack.
Ethan came home from nursery and was eating them on its own the whole afternoon! We didn’t have much left to freeze by the end of the day, but if you have plenty left, you can freeze them. Frozen buns can be stored for a couple of months.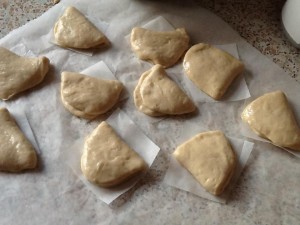
Instead of pork belly, you can opt for a healthier option of using minced meat or even Quorn.
I used left over Bolognese sauce with loads of minced vegetable and beef as the filling.
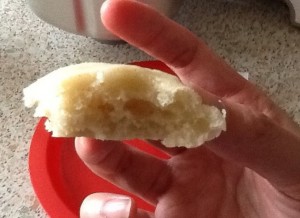
Whatever you use as the fillings, these buns are soft and scrumptious as they are (proven by my little fussy eater who devoured most of the buns).
