Author's posts
Dec 05
Experimental Cookery: Water Roux Starter (TangZhong)
I found this cool site, promoting the book “Experimental cookery from the chemicals and physical standpoint” by Belle Lowe (okay I am a nerd, read on as it may be interesting for bread maker enthusiasts). A section of the book describes factors that may change the properties of gluten and hence its tenacity or cohesiveness, and its elasticity or extensibility. Belle describes that, “the properties of gluten can be altered by: (1) grinding, (2) bringing the dough to a certain acidity or alkalinity and subsequent neutralization, (3) treating with alcohol, (4) salts, (5) alkalies, (6) acids, (7) proportion of water used, (8) added substances, (9) temperature, (10) time of standing, (11) mechanical treatment of the dough, and (12) fermentation. By understanding and working with the principles described by Belle we can make some seriously good bread.
Coming across the use of TangZhong in bread making is like magic, better than fairy dust for bread. It makes my bread springy, soft and fluffy (almost like eating cotton candy).
Ingredients for making TangZhong (makes approximately 240 g)
- 1) 50 g bread flour (Plain or wholemeal or seed and grain bread flour works)
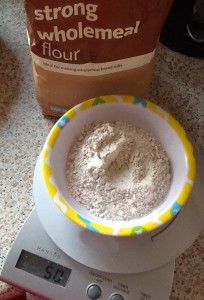
- 2) 250 mL water or fresh milk
Method for making TangZhong
1) Mix the flour with 100 mL of cold water or milk and make into a paste with a spatula.
2) Add the rest of the cold water or milk ensuring that there are no lumps.
3) Heat the flour mixture on low heat (about 65 degrees C) stirring continuously to prevent sticking and burning. It takes about 3 minutes.
4) Once the flour paste had thickened, your TangZhong is ready. Transfer it into a clean bowl and cover with a cling wrap to cool. You can keep the TangZhong to about 3 days in the refrigerator .
For the chemists out there:
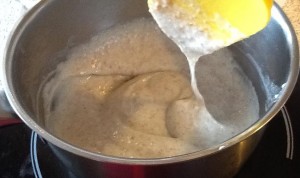
By making an initial paste in Step 1, this step will ensure that the flour is evenly mixed and hydrated. By heating the flour paste to 65 degrees C, the hydration of the gluten in the flour is enhanced making the dough more elastic and less tenacious. This increase in elasticity is important, for without this quality, the cell walls of the dough would break and coalesce before the temperature was reached at which the protein is coagulated (making hard bread).
If you have tried baking bread with TangZhong, I can guarantee you that there is no turning back. You will be so hooked and addicted to bread containing TangZhong!
Dec 03
My sous chef

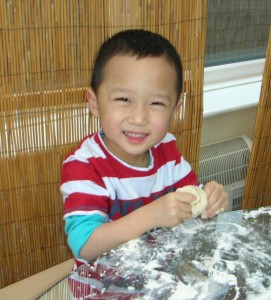
When my 3 year old is at home with me, I love to make him my sous chef. He loves to ‘tickle’ flour and whatever ingredients we prepared which includes oil, milk, sugar, eggs and butter. He loves to get in there and get dirty.
A sucker for punishment you may call me as after we finish cooking, (as you can imagine) there is usually a lot of cleaning involved!
My sous chef at work!

Dec 02
Making Hong Kong Sweet Buns (Pai Bao)
Pai Bao (排包) or translated as ‘roll bun’ is a kind of fluffy, soft sweet bun famous in Chinese bakery shops around the world probably originated from Hong Kong. The dough (or buns=Bao) are arranged in long rows (Pai).
This recipe is very easy to make especially if you have a bread maker to do the mixing and kneading. This is because the dough is very sticky and can be difficult to handle by hand during the initial mixing and kneading, not to say you could not do it by hand, but be prepared to get messy.
I came across this recipe from Christine’s Recipe blog. The recipe produces very soft and fluffy bread, the type that my family loves. I made sausage buns, bacon and cheese buns and Hokkaido milk toasts in accordance to her recipes and we were hooked. However, Pai Bao is still our favourite.
What makes this Pai Bao recipe so special? This Pai Bao recipe uses water roux starter also known as TangZhong. This recipe will not only produce cotton soft and fluffy bread, it is also very fragrant as it contains condense milk and cream. On the plus side, after the first proofing stage the dough turns very elastic and can be easily shaped. I use this Pai Bao recipe to make buns with fillings, adjusting the quantity of sugar depending on the fillings (do refer to my other posts for ingredients and methods on how to make the bun fillings and how to shape buns).
Read more about Christine’s recipes and my other recipes using this Pai Bao dough (Heart shaped cinnamon buns, Sweet sausage buns, mini sweet sausage rolls)
Ingredients
- 125 g milk (You can use full cream milk, semi-skimmed milk or skimmed milk)
- 120 g TangZhong (refer to my TangZhong post for more information)
- 28 g condensed milk
- 75 mL whipping cream (I have used single and double cream, either will do)
- 35 g salted butter, softened
- 1 egg york
- 24 g semi skimmed milk powder (or 12 g rich calcium milk powder to add more hidden goodness)
- 40 to 80 g caster (you may like to adjust to taste, we have sweet tooth)
- 370 g bread flour (I have used white, wholemeal, seed & grain bread flour)
- 6 g instant dry yeast
- 1 whisked egg (egg wash)
[Note] I did not use salt as I find it inhibits yeast action (trying to reduce salt intake as well), I use salted butter instead. For variations, you may add 2 teaspoons of green tea powder (for Green Tea Pai Bao) or 5 tablespoons of coco powder (for choc Pai Bao) or 1/4 teaspoons of pandan paste (for pandan Pai Bao) or throw in a handful of dried fruits (raisins, cranberries, blueberries … etc), they sky is the limit, be inventive and add your favourite flavour.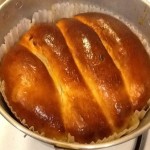
Method:
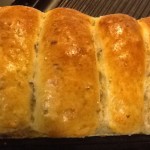 1) If you are using a bread maker, add the ingredients in the order above (leave the egg wash aside for later) and set the bread maker to ‘dough’ function, sit back and relax (you may need to check your bread maker’s manual for specific instructions)!The full cycle for the ‘dough’ function of my bread maker is about 1 hour 30 minutes which includes mixing, kneading and proofing. The dough should be prooved for approximately1 hour until double in size.
If you are mixing and kneading manually (good luck as it gets very sticky and messy at this stage, don’t say I didn’t warn you), mix all the dry ingredients first, make a well and add the wet ingredients in the well, work slowly to incorporate all the ingredients and knead the dough. Becareful not to over do the kneading as it may break the gluten in the flour. Leave to proof as above.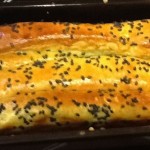
2) Transfer the dough to a clean floured surface. Deflate and remove the air in the dough. Divide into at least 6 equal portions (my 3 year old made 14 portions/rows of buns in a 20×20 cm square tin with this recipe).
3) Roll out each portion of the dough with a rolling pin into an oval shape. Fold 1/3 from top edge to the middle and press down. Then roll the dough to the edge. Pinch the dough to seal. Turn the sealed edges downward. Roll and stretch to about 20cm in length. With seal downwards, place the dough in the baking tin. Repeat this step with the rest of the dough. Proof the dough in the tins, covered with cling wrap or a damp cloth for 1 hours and 30 minutes (if you live somewhere warmer than UK, you can reduce the proofing time).
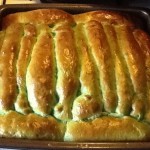 4) When the dough rises and almost reaches to the rim of the load tins, lightly brush the surface with whisked egg (egg wash). Bake in a pre-heated 150C oven for 15 to 20 minutes, until the buns turn brown.
5) Remove from the oven and transfer onto a wire rack. Let cool completely. I have a fan assisted oven, depending on your oven you may need to alter the temperature and time. As long as the top turns brown your buns should be ready. Only you know you oven best.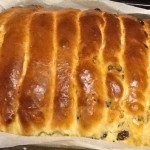
Dec 02
Welcome to Settys Life @ Home
I love experimental cooking and baking, using hubby, Ethan, neighbours and work colleagues as my guinea pigs to test my ‘masterpieces’. Having said that I am not the best cook or the most organised person in the world and neither would I claim to be a professional cook.
COOKING… KITCHEN… TOYS and BOYS
I love kitchen gadgets and have gadgets from ice cream maker, stand mixer, multipurpose food processor, ‘forever sharp knife’ , induction hob to little rubber bottle openers.

Image from Flickr
On this website, I will do my best on documenting my experimental cooking, provide reviews on my gadgets and describe general topics about my life as a working mum with two young boys at home. I do hope that you will find it useful if not entertaining and do feel free to provide constructive comments as you see fit. Always room for improvements.
